Aero bars can be the quickest way to make a road bike more effective for triathlon, time trials and fast solo riding. But the gains only arrive when you can hold the position comfortably, steer safely and still produce power. Knowing how to fit aero bars is less about copying the lowest position in the start pen and more about building a position you can sustain from the first mile to the final push.
Start with your event, bike and current position
Clip-on aero bars make the most sense for riders who already have a stable road-bike position and want a practical aerodynamic upgrade. They are popular for non-drafting triathlon, local time trials and long solo efforts. A dedicated TT bike gives greater adjustment range and a more forward geometry, but a well-fitted clip-on set-up can still make a meaningful difference.
First, check that your handlebar accepts clip-ons. Many round aluminium bars do, provided the clamp diameter matches. Carbon handlebars need more caution: some are explicitly approved for clip-ons, while others are not. Never assume. Check the handlebar manufacturer’s guidance before fitting anything, and do not clamp onto an aero-shaped section unless the bar is designed for it.
Your event regulations matter too. Triathlon rules, road-race rules and time-trial conventions are not identical. For draft-legal racing, short clip-ons and specific brake-lever clearance rules may apply. If you are unsure, check the regulations for the event before committing to a set-up.
Choose an aero-bar set-up you can adjust
The best aero bars are not automatically the longest, lowest or most expensive pair. Look for useful adjustment at the arm pads, extensions and risers. That flexibility lets you tune reach, stack, pad width and extension angle without replacing the whole system.
For most road-bike conversions, a ski-bend or moderately upturned extension is an easy place to start. It supports a neutral wrist position and gives a secure handhold when the road surface is rough. Straight extensions can suit some riders, particularly in shorter TTs, but they may place more load through the wrists and shoulders if the rest of the position is not right.
Pad shape also matters. Wider, more supportive pads can improve comfort on longer rides, while narrower pads may reduce frontal area for riders who can maintain them without squeezing their shoulders together. There is always a trade-off: a tiny reduction in frontal area is not useful if it causes you to sit up every few minutes.
How to fit aero bars: set the clamps first
Clean the handlebar clamping area, then position the clamps according to the manufacturer’s instructions. On a conventional round drop bar, clip-ons usually sit close to the stem, where the bar is strongest and offers the greatest control. Leave enough room for cables, computer mounts and your hands on the tops and hoods.
Apply the stated torque with a quality torque wrench. This is particularly important with carbon components. Overtightening can damage a handlebar without leaving an obvious warning sign, while an under-tightened clamp can rotate under load. If carbon assembly paste is specified by the component maker, use it sparingly and only where approved.
Set both clamps symmetrically. Stand over the front wheel and look down the bike to make sure the extensions point straight ahead rather than drifting left or right. Do not make final decisions about reach or pad position yet. The clamps are the stable foundation; the fine adjustment comes next.
Build comfort before chasing the lowest position
Start with the pads approximately level with the top of the handlebar or only slightly lower. This may look conservative, but it gives your back, neck and shoulders a chance to adapt. A low front end can be fast for a rider with the mobility, core control and training history to support it. For everyone else, it can close the hip angle, restrict breathing and turn a promising set-up into an expensive place to rest your elbows.
Set the pads so your elbows sit securely in their centres, rather than perched at the rear edge. As a starting point, position the pads around shoulder-width apart or marginally narrower. Your upper arms should feel supported, not forced inwards. If your chest feels compressed or your shoulders shrug towards your ears, move the pads wider or raise them slightly.
Reach is equally important. With hands resting naturally on the extensions, you want a relaxed bend in the elbows and a neutral shoulder position. If you are stretched out, you will lock your elbows and load your neck. If the extensions are too short, you may feel cramped and unstable, with too much weight on the pads.
A useful initial target is for the extension tips to finish around your knuckles or slightly beyond when your elbows are planted in the pads. It is only a starting point. Longer reach can work for tall riders or aggressive TT positions, while shorter reach can be more sustainable for a road-bike conversion.
Set extension angle, saddle and cockpit together
Angle the extensions slightly upward if that allows your wrists to stay straight and your hands to rest naturally. Many riders find that a modest upturn improves comfort and makes it easier to keep the head low without straining the neck. Keep both extensions aligned and tighten all adjustment bolts to specification.
Do not alter your saddle position dramatically just because you have added aero bars. Moving the saddle forward can open the hip angle and help a triathlon position, especially on a dedicated TT frame. On a road bike, however, a large change can affect handling, knee comfort and your relationship with the pedals. Make small changes, one at a time, and give each change several rides before deciding whether it works.
If your hips rock, your knees feel crowded at the top of the pedal stroke or your power drops sharply in the aero position, the front end may be too low, too long or both. Raising the pads by 10 mm can be more effective than endlessly adjusting the saddle. Position is a system, not a collection of isolated measurements.
Test the position where it counts
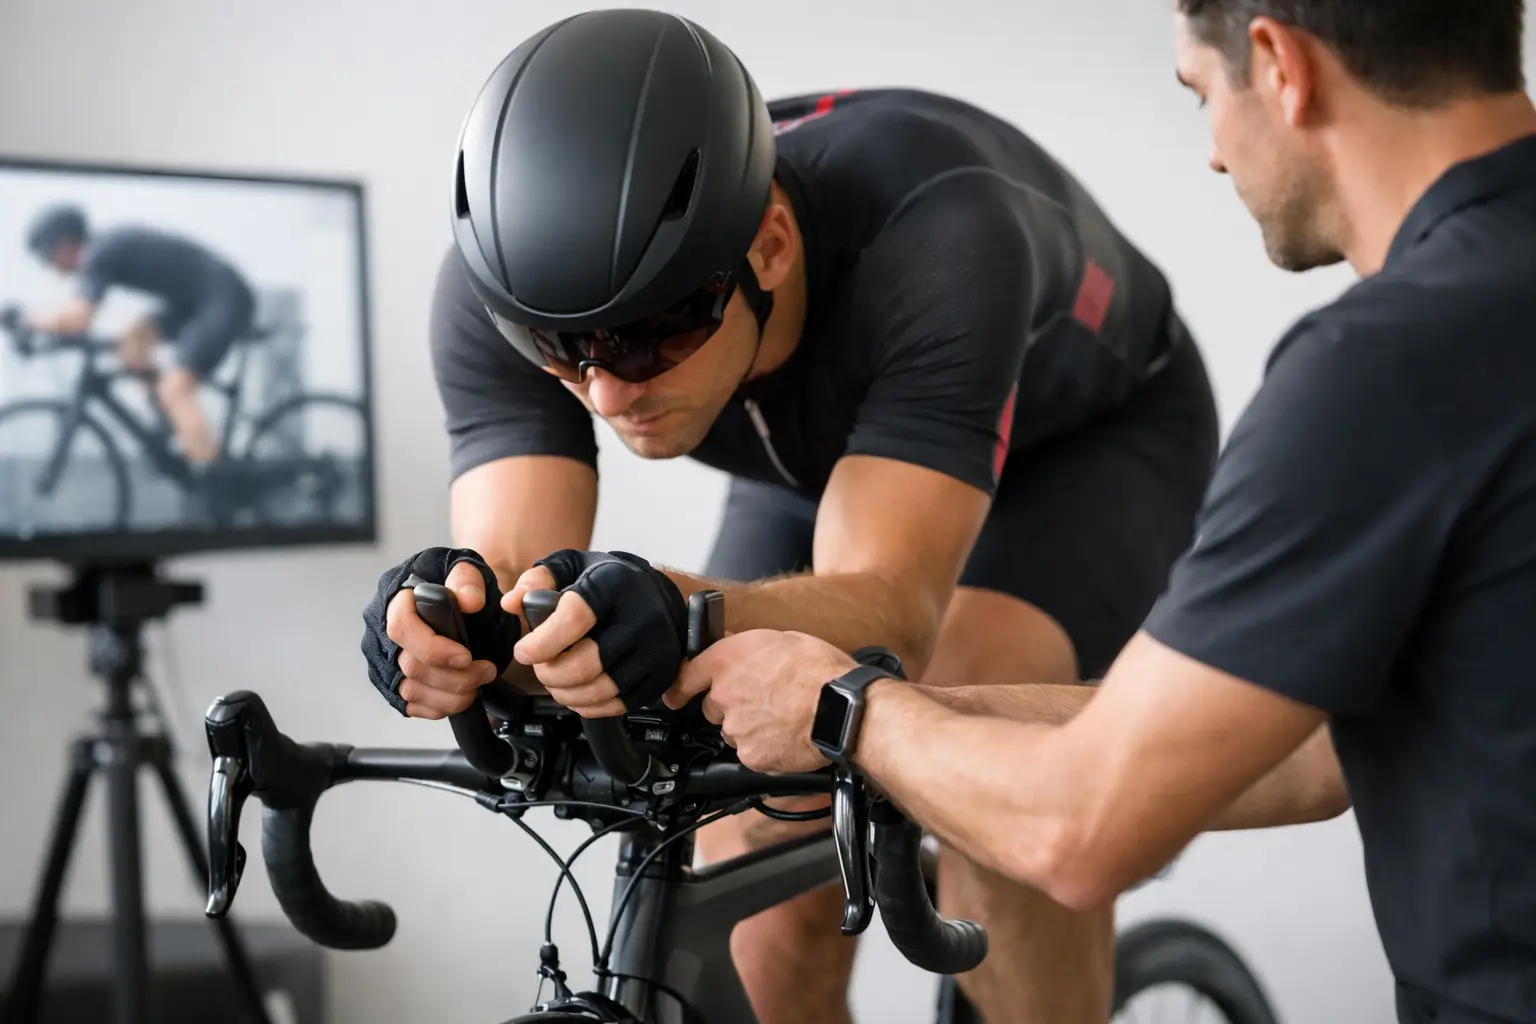
A turbo trainer is ideal for the first fit because it lets you concentrate on posture without traffic or poor road surfaces. Ride easily for 20 to 30 minutes, then spend several blocks in the aero position at a steady endurance effort. Notice whether you can breathe freely, look ahead comfortably and keep your elbows planted without constantly shifting.
Then test the set-up outside on a familiar, quiet route. Practise moving safely between the hoods and extensions, braking from the base bar and riding over typical UK road surfaces. Aero bars reduce access to your brakes and shifters, so they are for predictable roads and clear conditions, not busy group rides, technical descents or congested town centres.
Use this quick check before your first proper aero ride:
- The clamps and pad bolts are tightened to the manufacturer’s stated torque.
- Cables, brake hoses and computer mounts are clear of the moving parts.
- You can steer, brake and move back to the hoods without snagging clothing or cables.
- The extensions, pads and armrests remain centred after a short road test.
Refine in small, measured steps
The temptation is to chase an aggressive position after seeing professional riders folded low over their TT bikes. Their bikes, flexibility, race durations and fit support may be very different from yours. A position that is slightly higher but held for the entire effort will usually beat a low position that breaks down after ten minutes.
Make one adjustment at a time, ideally no more than 5 to 10 mm. Record pad height, pad reach, pad width and extension length before changing anything. Then test the alteration at a repeatable effort on the same route or trainer session. If you use a power meter, compare not just peak power but how comfortably you can hold your normal race effort while remaining aero.
Persistent neck pain, numb hands, shoulder discomfort or knee pain are signals to reassess rather than push through. A professional bike fit is particularly valuable if you are preparing for a target triathlon or TT, moving to a dedicated aero bike, or struggling to balance comfort with power. At Trifit Bikes, performance-minded riders should expect fit to guide equipment choices, not be an afterthought.
The right aero-bar position should feel purposeful rather than precarious. Set it up patiently, give your body time to adapt, and you will arrive at the start line with a position you can trust when the effort gets serious.